
If you’re a professional nail technician or a home manicure enthusiast, you know how quickly fine nail dust can build up inside your tools. Over time, this dust can clog the motor, reduce performance, and create a breeding ground for bacteria, fungi, and viruses that may lead to infections.
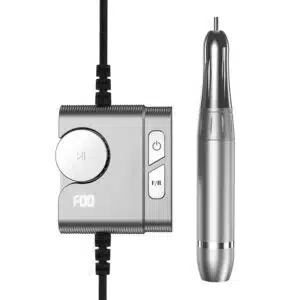
Regular cleaning is essential to keep your nail drill running safely and efficiently. A proper routine not only removes dust and disinfects drill bits but also extends the lifespan of your equipment. Tools like the LANCOLOR Nail Drill Machine are designed with easy maintenance in mind, making cleaning quicker and more convenient.
Key Takeaways
- Always unplug your nail drill before cleaning to prevent electrical accidents
- Use a soft brush and canned air to remove dust from hard-to-reach internal areas
- Clean and disinfect drill bits after every use to prevent cross-contamination between clients
- Never soak the handpiece in water; use a damp cloth for exterior cleaning only
- Store your nail drill in a dry, dust-free case to extend its lifespan
- Avoid oil, sharp tools, and high-pressure air that can damage internal components
Preparing to Clean Your Nail Drill
Why Regular Cleaning Matters
A dirty nail drill poses both health and performance risks:
- Health risks: Trapped dust and debris harbor pathogens that can spread nail fungus, bacterial infections, and viruses
- Performance issues: Dust buildup slows the motor, reduces torque, and causes inconsistent speed
- Lifespan reduction: Uncleaned drills typically last only 1–2 years, compared to 3–5 years with proper maintenance
Pro Tip: Clean your nail drill immediately after each use. This prevents dust from hardening and becoming difficult to remove later.
Tools and Materials You’ll Need
Gather the following supplies before you start to ensure safe and effective cleaning:
- Soft nylon bristle brush (toothbrush-sized works best)
- Canned compressed air (with straw attachment)
- Lint-free microfiber cloths
- 70% isopropyl alcohol or Barbicide disinfectant
- Acetone (for removing gel residue from bits)
- Ultrasonic cleaner (optional, for deep cleaning bits)
- Clean, dry towel
Step-by-Step Guide to Cleaning a Nail Drill

1. Power Off and Disassemble
Always prioritize safety by unplugging the nail drill completely before cleaning, as working on a connected device can be dangerous. Remove all drill bits and sanding bands from the handpiece, then unscrew the collet nut and take out the collet—the component that holds the bit in place. If your model allows, separate the handpiece from the main unit, and place all parts neatly on a clean, dry towel to keep them organized and protected during the cleaning process.
2. Remove Surface Dust and Debris
Use a soft nylon brush to gently sweep away loose dust from all exterior surfaces, paying special attention to the collet area, bit opening, and ventilation slots where debris tends to accumulate. Then, hold a can of compressed air about 6 inches away and use short bursts to blow dust out of small crevices. Finish by wiping the entire exterior with a dry microfiber cloth to remove any remaining particles and leave the surface clean.
Warning: Never hold the canned air directly against the motor vent or tilt the can upside down. This can release liquid propellant that damages internal components.
3. Clean and Disinfect Drill Bits
Drill bits come into direct contact with skin and nails, so they require thorough cleaning and disinfection:
- Scrub each bit with a nylon brush and warm soapy water to remove nail debris
- Rinse thoroughly and pat dry with a clean cloth
- For gel residue, soak bits in acetone for 5–10 minutes
- Disinfect by soaking in 70% isopropyl alcohol for 30 minutes or Barbicide solution (1 oz per 16 oz water) for 10 minutes
- For the deepest clean, use an ultrasonic cleaner with jewelry cleaning solution for 5–10 minutes
- Lay bits on a clean towel to air dry completely before storing
Critical Note: Never skip the disinfection step. This is the only way to prevent the spread of infections between clients.
4. Clean the Handpiece and Exterior
Wipe the handpiece, power cord, and main unit with a lint-free cloth lightly dampened with 70% isopropyl alcohol, making sure to focus on high-contact areas like the grip, where oils and residue tend to build up. For tighter spaces, use a cotton swab dipped in alcohol to carefully clean around the collet opening and control buttons.
Avoid using excess liquid and never submerge the handpiece or main unit in water, as moisture can damage internal components and permanently affect the motor.
After-Cleaning Care and Storage
Drying and reassembly
Place all parts on a clean towel in a well-ventilated area and allow them to air dry completely, ensuring no moisture remains inside the handpiece or collet before reassembly. Once fully dry, reattach the collet, secure the collet nut, reconnect the handpiece to the main unit, and test the drill at the lowest speed setting to confirm it is functioning properly.
Important: Never reassemble or use a wet nail drill. Moisture can cause electrical shorts and permanent motor damage.
Proper Storage to Prevent Dust Buildup
Properly storing your nail drill can keep it clean and make it convenient for next use:
- Store your nail drill in a closed, dust-proof case or box
- Keep drill bits in a separate organizer with individual slots
- Store in a cool, dry place away from direct sunlight and moisture
- Remove bits from the handpiece before long-term storage to prevent bending and dulling
Nail Drill Maintenance Tips and Common Mistakes
Recommended Cleaning Schedule
The table below shows how regular cleaning can help extend the life of your electric nail file:
| Task | Frequency |
|---|---|
| Wipe exterior and remove surface dust | After every use |
| Clean and disinfect drill bits | After every use |
| Deep clean handpiece and internal areas | Weekly |
| Full inspection and maintenance | Monthly |
Common Mistakes to Avoid
Some people make mistakes when maintaining their nail drill. These mistakes can damage the tool or cause it to malfunction. Here are some common mistakes and how to avoid them:
- Using sharp tools to clean inside the handpiece: This can scratch delicate internal components
- Applying oil or lubricant: Oil attracts dust and will cause the motor to seize up over time
- Disassembling the motor unit: Only remove the handpiece, collet, and bits as directed by the manufacturer
- Using too much liquid: Excess moisture can damage the motor and electrical components
- Skipping disinfection: This puts you and your clients at risk of serious infections
Conclusion
Regular cleaning and maintenance are essential for the safety, performance, and longevity of your nail drill. By following the step-by-step guide in this article, you can remove dust buildup, prevent bacterial growth, and keep your drill working like new for years.
The LANCOLOR Nail Drill Machine is designed with easy cleaning in mind, featuring a quick-release handpiece and sealed motor that significantly reduce maintenance time. With proper care, it will provide reliable performance for thousands of manicures.
FAQ
How often should someone clean a nail drill?
Wipe the exterior and clean drill bits after every use. Do a full deep cleaning of the handpiece and internal areas once a week. For heavy professional use, deep clean after every 5–6 clients.
Can users use water to clean the handpiece?
No. Never soak the handpiece in water or run it under the tap. Use a damp (not wet) cloth to wipe the exterior only. Water will damage the motor and electrical components.
What is the safest way to disinfect nail drill bits?
The most effective methods are soaking in 70% isopropyl alcohol for 30 minutes or Barbicide solution for 10 minutes. An ultrasonic cleaner provides the deepest clean for professional use. Always dry bits completely before storing.
Why does dust build up inside a nail drill?
Filing and shaping nails creates fine, powdery dust that is drawn into the drill through ventilation slots. Over time, this dust accumulates on the motor and internal parts, causing performance issues.
Is it safe to share a nail drill with others?
Yes, but only if you thoroughly clean and disinfect the entire drill and all bits between each use. Never share a drill without proper disinfection, as this can spread infections.
How do I prevent my drill bits from rusting?
Always dry bits completely after cleaning and disinfection. Store them in an airtight container with a desiccant packet to absorb moisture. Avoid leaving bits in water or disinfectant solution for longer than the recommended time.