
Yes! With the right tools, proper technique, and safety precautions, anyone can achieve salon-quality nails at home using an electric nail drill. However, using a nail drill incorrectly can cause serious damage to your nails and skin.
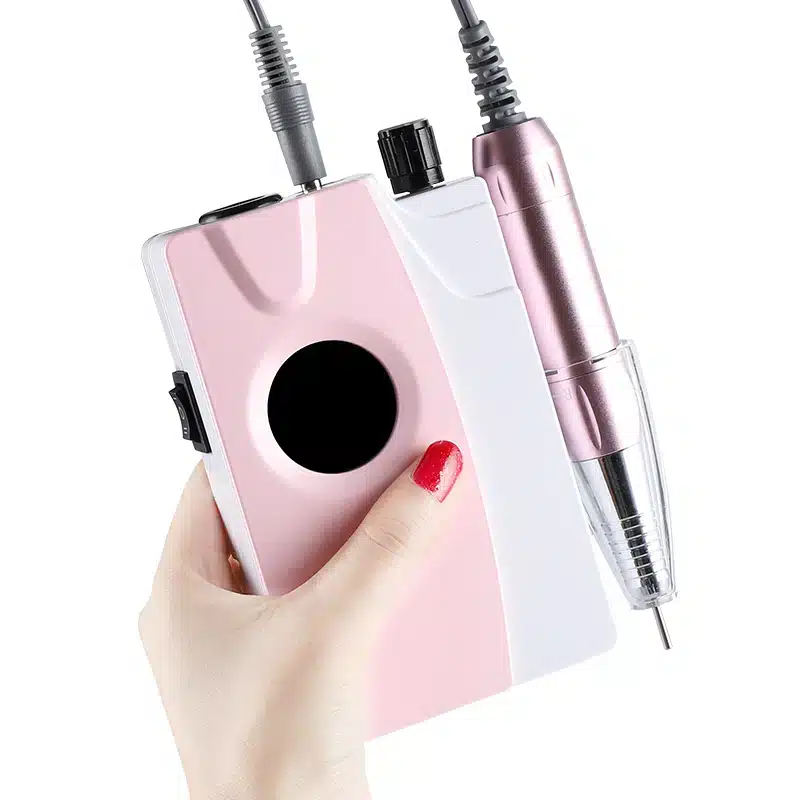
In this complete beginner’s guide, we’ll explain exactly how to use a nail drill safely, what features to look for when buying one, and how to avoid the most common mistakes. The LANCOLOR Nail Drill Machine is specifically designed for beginners, making home nail care easier and safer than ever.
Key Takeaways
- You can safely use a nail drill at home with proper training and safety precautions
- Always start at the lowest speed setting (3,000–5,000 RPM) for natural nails
- Use light pressure and let the drill do the work to avoid nail damage
- Practice on fake nails first before working on your real nails
- Clean and disinfect your drill and bits after every use to prevent infection
- The LANCOLOR Nail Drill is ideal for beginners with its easy controls and safety features
Best Practices for Safe Home Nail Drill Use

Can You Safely Use a Nail Drill at Home?
Nail drills are no longer just for professional salons. Modern home-use nail drills are designed to be user-friendly and safe for beginners. The key to safe use is learning proper technique, starting slow, and respecting the power of the tool.
Many people successfully use nail drills at home for:
- Shaping and smoothing natural nails
- Removing gel polish and dip powder
- Cleaning cuticles
- Prepping nails for acrylics or gel extensions
The LANCOLOR Nail Drill Machine makes home use even safer with built-in overload protection that automatically shuts off the motor if it overheats, preventing burns and equipment damage.
Common Risks & How to Avoid Them
While nail drills are safe when used correctly, improper technique can lead to injuries:
| Risk | Description | Prevention |
|---|---|---|
| Thin, Brittle Nails | Over-filing removes too much of the nail plate | Use light pressure and avoid filing in one spot |
| Heat Burns | Friction from the drill bit generates heat | Keep the bit moving and take frequent breaks |
| Onycholysis | Nail separation from the nail bed | Never press hard or file too deep |
| Skin Cuts | Accidentally drilling the cuticles or sidewalls | Keep the drill at a 45° angle and work slowly |
| Infection | Dirty tools spread bacteria and fungi | Disinfect all bits and the drill after each use |
⚠️ CRITICAL SAFETY WARNING: Never use the nail drill on your skin, cuticles, or soft tissue around the nails. Always keep the bit moving and never stay in one spot for more than 1–2 seconds.
How to Choose the Best Nail Drill for Beginners
Essential Features to Look For
| Feature | Why It Matters for Beginners |
|---|---|
| Clear Speed Control | Allows you to start slow and increase speed gradually |
| Overload Protection | Prevents overheating and motor damage |
| Ergonomic Design | Pen-shaped, lightweight design reduces hand fatigue |
| Low Vibration | Makes the drill easier to control |
| Standard Bit System | Compatible with widely available replacement bits |
Why LANCOLOR Is Perfect for Beginners
The LANCOLOR Nail Drill Machine checks all the boxes for a beginner-friendly drill:
- Brushless motor: 50% quieter and 3x longer lasting than traditional brushed motors
- Non-slip grip: Prevents slips and accidents
- Rotating lock handle: Makes changing bits quick and easy
- 6 included bits: Everything you need for basic home nail care
- Adjustable speed: 0–30,000 RPM with precise control dial
Essential Tools & Preparation
Recommended Drill Bits for Beginners
Start with these gentle bits designed for natural nails:
| Drill Bit Type | Best For | Grit Level |
|---|---|---|
| Diamond Cuticle Round Bit | Cleaning cuticles | 150 grit |
| Diamond Cuticle Ball Bit | Smoothing cuticle area | 150 grit |
| Cross Cut Medium Bit | Prepping nail surface | 150 grit |
| Fine Sanding Band | Shaping and smoothing nails | 180–240 grit |
Workspace Prep
- Choose a well-lit, clean area
- Lay down a towel to catch dust
- Sanitize all tools with rubbing alcohol
- Wash your hands thoroughly
- Remove old nail polish and trim nails to desired length
- Put on safety glasses and a dust mask
💡 Pro Tip: Practice on disposable fake nail tips first until you feel comfortable with the drill’s speed and control.
Step-by-Step Guide to Using a Nail Drill
1. Set Up Your Drill
- Place the drill on a stable surface
- Insert the appropriate bit and tighten securely
- Set the speed to the lowest setting (3,000–5,000 RPM)
- Hold the drill like a pencil with a relaxed grip
- Rest your working hand on the table to reduce shaking
2. Basic Technique
- Turn on the drill and let it run for a few seconds to get used to the sound
- Gently touch the bit to the nail surface at a 45° angle
- Move the drill in smooth, back-and-forth motions following the natural curve of the nail
- Let the drill do the work – do not press down hard
- Take breaks every 30 seconds to prevent heat buildup
3. Recommended Speeds by Task
| Task | Beginner Speed (RPM) |
|---|---|
| Cuticle cleaning | 3,000 – 5,000 |
| Natural nail shaping | 5,000 – 10,000 |
| Gel polish removal | 8,000 – 10,000 |
| Acrylic bulk removal | 14,000 – 16,000 (advanced only) |
Increase speed only as you become more comfortable and skilled.
Nail Drill Care and Problem Prevention
Troubleshooting Common Mistakes
Many people want to achieve salon-quality nail art at home, but mistakes are inevitable if not done correctly. Common problems with electric nail machines include:
| Problem | Cause | Solution |
|---|---|---|
| Nail feels hot | Staying in one spot too long, too much pressure | Take a break, use lighter pressure, keep the bit moving |
| Grooves in nail | Uneven pressure, wrong angle | Use a fine buffer to smooth out grooves |
| Drill bit slips | Loose bit, oily hands | Tighten the bit securely, wash and dry your hands |
| Motor stops suddenly | Overload protection activated | Turn off the drill, let it cool down for 5 minutes |
If you accidentally damage your nail, stop immediately. Apply a cool compress if there is burning, and use a nail strengthener to help your nails recover.
Cleaning & Maintenance
Proper cleaning and maintenance will extend the life of your drill and prevent infection:
| Task | Frequency |
|---|---|
| Empty dust compartment | After each use |
| Clean bits with soap and water | After each use |
| Disinfect bits with rubbing alcohol | After each use |
| Wipe drill body with damp cloth | Weekly |
| Replace worn bits | Every 3–6 months |
| Full deep clean | Monthly |
Conclusion
Using a nail drill at home is completely safe when you follow proper safety guidelines and take the time to learn the correct technique. Start slow, practice on fake nails, and always prioritize safety over speed.
The LANCOLOR Nail Drill Machine is the perfect choice for beginners, with its easy-to-use controls, built-in safety features, and durable construction. It includes everything you need to get started with professional-quality home nail care.
To learn more about the LANCOLOR Nail Drill Machine and find the perfect model for your needs, visit our website today.
FAQ
How often can I use a nail drill at home?
Most people use a nail drill every 2–3 weeks for maintenance. Beginners should wait 3–4 weeks between uses to allow their nails to recover.
Can a nail drill damage natural nails?
Yes, improper use can cause thinning, brittleness, and even permanent nail damage. Always use light pressure, low speeds, and keep the bit moving.
Do I need special training to use a nail drill at home?
No license is required for home use. Watch tutorial videos, read guides like this one, and practice on fake nails first to build your skills.
Can I use a nail drill to remove gel polish?
Yes, but be very careful. Use a fine sanding band at 8,000–10,000 RPM and only remove the top layer of gel. Stop as soon as you see your natural nail.
How do I clean and disinfect nail drill bits?
Wash bits with soap and water to remove debris, then soak in 70% rubbing alcohol for 10 minutes. Dry completely before storing to prevent rust.